
AML MIFI Setup
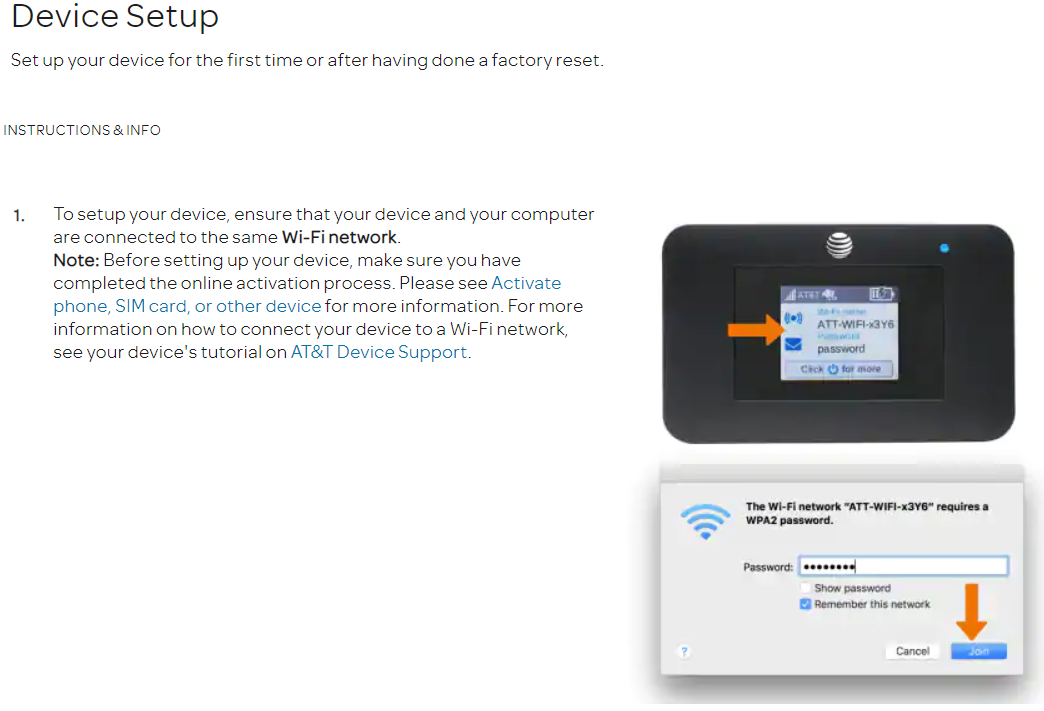
- It is very important that all data is entered in the same exact way and is consistent if you setting up multiple devices! If something is lowercase or capitalized make sure to enter it in the same way as the instructions show!
- The easiest way to set up these devices is with your cell phone, but it can be done by computer as well. Begin by finding the network name on the device in your WIFI settings and connecting with the password below the network name on the device.
- Once connected to the MIFI open a web browser on your phone or computer and go to http://attwifimanager (It’s easiest to bookmark this on your device since you will be visiting this page multiple times)
Username: admin
Password: (enter desired password)
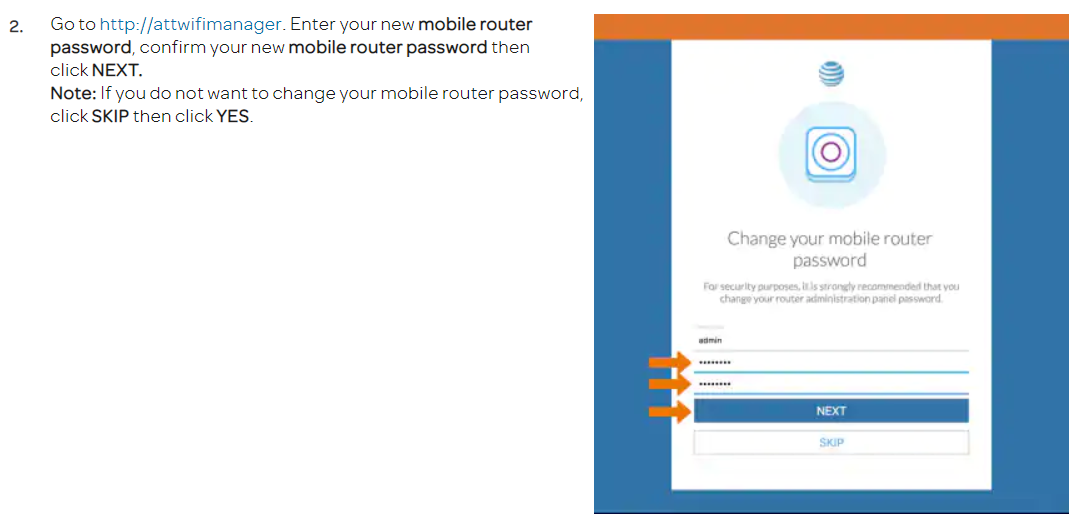
Do not change the network name
Password for ALL MIFIs: (Enter desired password)
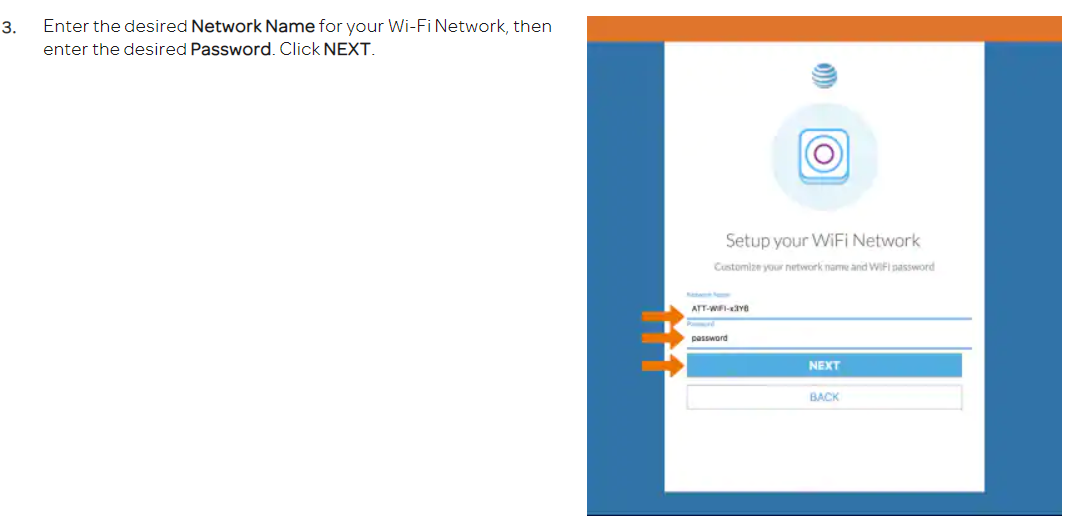
- Select Apply. The password displayed on the MIFI should now show the updated password, and you will also lose your connection to the MIFI.
- Return to the WIFI connection list on your phone or computer, and reconnect to the MIFI with the new password
- On the ATT WIFI Manager website select the three horizontal lines on the top left of the page for the Unite Express, top right for the Nighthawk

- Unite Express: Menu - Settings – Mobile Broadband – APN - enter AML credentials
- Nighthawk: Menu – Settings - Advanced Settings – Cellular – APN – ADD – enter work around credentials
Netgear Nighthawk APN work around:
Name: ATT
APN: broadband
Authentication: None
IPv4v6
Roam: IPv4
You will need to select the APN you just created, then reboot the device.
Now go back into the new APN and edit the settings to the desired AML settings, save, and reboot the device.
Name: AML
APN: vpn.accessmylan.net
Username: data
Password: data
Authentication type: PAP
- Select the APN profile, go to the homepage, and go back to the APN page to make sure it is still selected